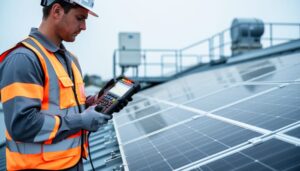
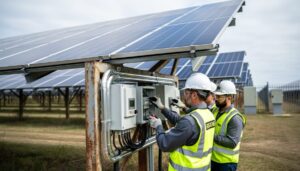
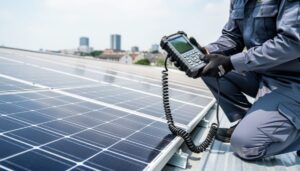
How to Repair Solar Panels: Complete Steps for Homeowners and Installers
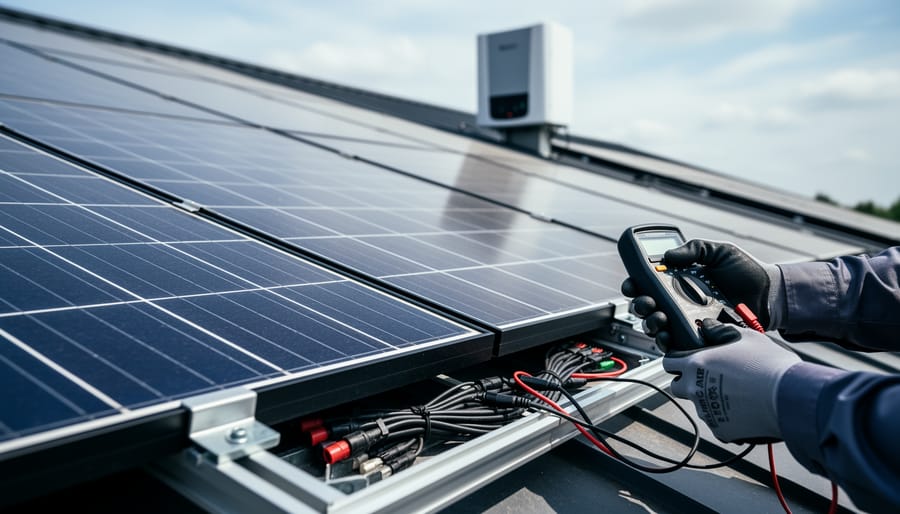
Repairing a solar panel system typically involves diagnosing electrical faults, replacing damaged components, or cleaning corroded connections. Most homeowners can handle basic troubleshooting and minor fixes with the right tools and safety precautions, but repairs involving high-voltage inverters, roof work, or warranty-protected equipment require licensed professionals. The repair process itself is straightforward once you understand which issues fall within DIY territory and which demand expert intervention.
Solar systems are engineered for decades of minimal maintenance, yet components do fail. Inverters typically need replacement after 10 to 15 years, while panels themselves can develop microcracks, bypass diode failures, or connection issues. The challenge isn’t just identifying what’s broken but determining whether the repair preserves your warranty, meets local electrical codes, and maintains system safety. A single mistake with DC wiring can create fire hazards or void manufacturer coverage worth thousands of dollars.
This guide walks through the complete repair process, from initial system diagnosis to final performance verification. You’ll learn which tools are essential, how to safely isolate power before any work begins, and the specific steps for addressing the most common failure points in residential solar installations. Equally important, you’ll understand the clear threshold where professional repair becomes non-negotiable.
The solar industry has matured significantly by 2026, with standardized components and better diagnostic tools making many repairs more accessible than ever. Leading manufacturers now provide homeowner-friendly monitoring platforms that pinpoint problems before they escalate. However, the complexity of modern grid-tied systems with battery storage and rapid shutdown requirements means repair knowledge must evolve beyond simple panel cleaning. Whether you’re troubleshooting a sudden production drop or planning preventive maintenance, understanding the repair landscape protects both your investment and your safety.
When Solar Panels Need Repair: Recognizing the Signs
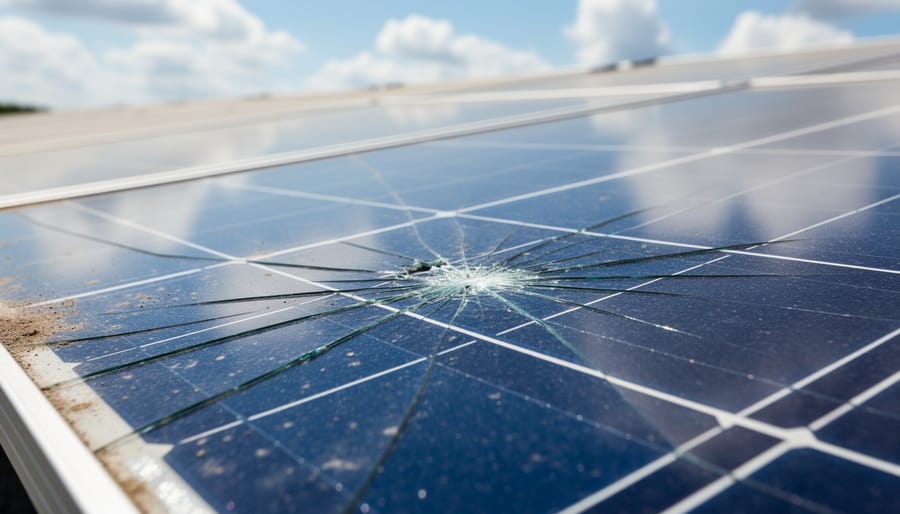
Knowing when your solar panels need attention versus experiencing normal wear can save you thousands in lost energy production. Solar panels typically lose about 0.5% efficiency per year through natural degradation, but certain warning signs indicate actual problems requiring repair.
The most obvious indicator is a sudden drop in energy production that doesn’t match weather patterns. If your monitoring system shows a 15-20% decrease in output compared to the same period last year, you’re likely dealing with a repairable issue rather than normal aging. Cross-reference your production data with local weather records to rule out cloudy periods before investigating further.
Physical damage becomes apparent during visual inspections. Check panels quarterly for cracks in the glass, discoloration or burn marks on cells, moisture trapped under the glass surface, and corrosion around junction boxes or mounting hardware. Even hairline cracks can allow moisture intrusion that accelerates damage to electrical components.
Your inverter serves as the system’s diagnostic center, and error codes or warning lights demand immediate attention. Most modern inverters log fault codes that pinpoint specific problems, from ground faults to communication failures between panels and the inverter itself.
Key warning signs that require investigation include:
- Production drops exceeding 15% compared to previous year baselines
- Visible cracks, chips, or shattered glass on panel surfaces
- Brown or yellow discoloration indicating overheating cells
- Persistent error codes or red warning lights on the inverter display
- Hot spots detected during infrared inspection or physical touch tests
- Loose wiring connections or corroded terminals at junction boxes
- Moisture condensation visible inside the panel enclosure
Thermal imaging reveals problems invisible to the naked eye. Hot spots appear as bright areas on infrared scans and indicate failing bypass diodes, damaged cells, or poor electrical connections. These thermal anomalies often precede complete component failure by weeks or months.
Don’t ignore intermittent issues that seem to resolve themselves. A string that occasionally goes offline or an inverter that resets during certain conditions signals underlying problems that will worsen without intervention. Document these patterns to help technicians diagnose root causes during repair assessments.
Tools, Materials, and Qualifications You’ll Need
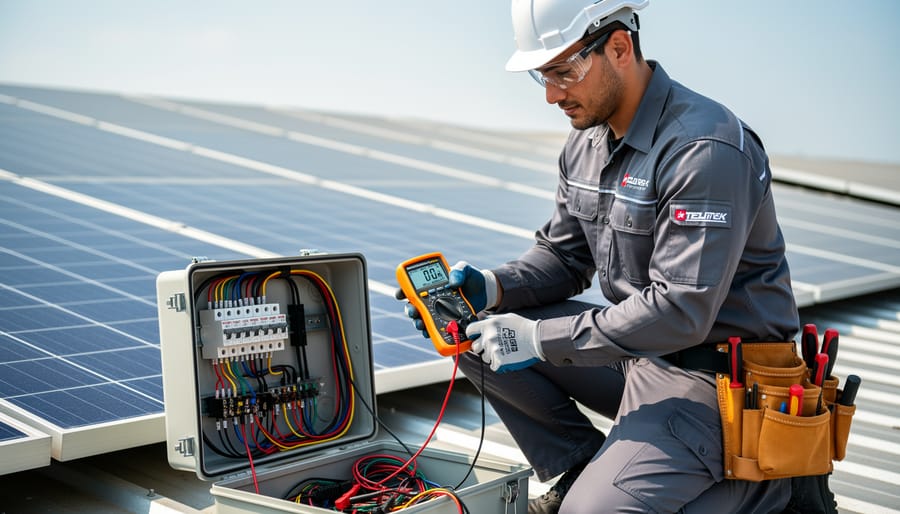
Successful solar panel repairs depend on having the right diagnostic and repair equipment before you begin. Basic troubleshooting requires a digital multimeter capable of measuring DC voltage up to 600V, which lets you test individual panel outputs and verify circuit continuity. For more advanced diagnostics, thermal imaging cameras identify hot spots indicating failed bypass diodes or poor electrical connections, though entry-level models start around $200 while professional-grade units exceed $2,000.
Essential repair materials include bypass diodes rated for your specific panel voltage (typically 15A, 45V for residential systems), marine-grade silicone sealant for weatherproofing connections, and replacement junction box assemblies compatible with your panel manufacturer. Keep UV-resistant cable ties, proper gauge MC4 connectors, and electrical tape rated for outdoor use in your repair kit. Many premium brands like Trina solar modules use manufacturer-specific components that ensure optimal performance when sourced directly rather than using generic replacements.
The critical distinction comes down to qualifications and safety. Homeowners can handle basic visual inspections, cleaning debris from panels, and tightening loose mounting hardware without special certifications. However, any work involving electrical connections, wiring repairs, or component replacement requires licensed electrician credentials in most jurisdictions. Opening junction boxes or working with DC circuits above 50V creates serious arc flash and electrocution hazards that demand professional training.
Inverter repairs and grid-tied system modifications absolutely require certified solar technicians with NABCEP certification or equivalent credentials. These professionals carry specialized isolation tools, proper personal protective equipment including arc-rated clothing and face shields, and the insurance coverage that protects both the worker and your system warranty. Many manufacturers void warranties if non-certified technicians perform repairs, making professional service essential for newer installations.
Before attempting any electrical repair yourself, verify your local building codes and utility interconnection agreements. Some regions require licensed electricians to pull permits even for minor solar repairs, while others restrict all DC electrical work to certified professionals regardless of homeowner experience level.
Critical Safety Precautions Before Starting Any Solar Repair
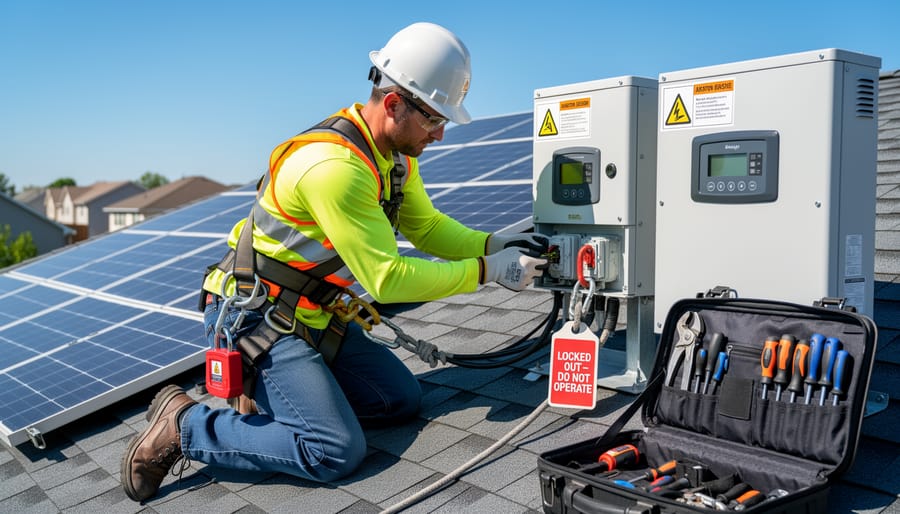
Solar panel systems present electrical hazards that differ fundamentally from typical household AC wiring, requiring specialized safety knowledge before attempting any repair work. Unlike conventional electrical systems that can be switched off completely, solar panels generate DC voltage whenever exposed to light, even on cloudy days or under artificial lighting, making them impossible to fully de-energize without physical covering or disconnection.
Before touching any solar equipment, verify that your local jurisdiction allows homeowner repairs on solar installations. Many areas require licensed electricians for any work on grid-tied systems, and unauthorized repairs can trigger code violations that complicate future home sales or insurance claims.
DC voltage from solar arrays poses distinct dangers compared to AC power. DC current doesn’t naturally “let go” like AC does, meaning contact can cause sustained muscle contractions that prevent releasing the conductor. String voltages commonly reach 300-600 volts DC in residential systems, well above lethal thresholds. Arc flash hazards are particularly severe with DC systems because the arc doesn’t self-extinguish at zero-crossing points like AC does.
Proper personal protective equipment is non-negotiable for solar repairs. Wear insulated gloves rated for the system’s maximum voltage, safety glasses with side shields, and non-conductive footwear. Never work alone on a roof-mounted system, and ensure fall protection equipment meets current OSHA standards for your working height.
Implement lockout/tagout procedures even for residential systems. After shutting down the inverter and opening DC disconnects, lock them in the off position and attach tags indicating repair work in progress. Cover panels with opaque tarps to eliminate light exposure during component replacement, though remember that uncovering them instantly restores voltage generation.
Know your limits. If you encounter damaged racking that affects structural integrity, inverter faults that require photovoltaic testing equipment, or any situation where you’re unsure about safe procedures, stop immediately and contact a certified solar technician. Professional repair services carry specialized voltage detection equipment, arc-rated protective gear, and liability coverage that protects both the technician and your property.
Step-by-Step Solar Panel Repair Process
Step 1: System Shutdown and Isolation
Before touching any solar equipment, you must eliminate electrical hazards through proper shutdown procedures. Solar panels generate DC voltage whenever light hits them, even on cloudy days, making complete de-energization impossible without covering the array or working at night.
Start at the inverter inside your home. Press the power button or flip the breaker to shut down AC conversion. Next, locate the DC disconnect switch, typically mounted near the inverter or on your home’s exterior wall. Turn this to the “OFF” position to isolate the solar array from all downstream equipment.
Wait at least five minutes for capacitors to discharge fully. Now verify zero voltage using a multimeter rated for at least 600V DC. Test between positive and negative DC lines at the combiner box, then test each line to ground. Only proceed when readings confirm zero volts across all points.
If you’re working on rooftop panels during daylight, cover the affected modules with opaque tarps before disconnecting any wiring. This stops current generation at the source. Never assume a system is safe because the inverter is off, DC voltage remains present at the panel level until you block sunlight or complete darkness falls.
Step 2: Diagnostic Assessment and Problem Identification
Once your solar system is safely isolated, methodical diagnostics reveal exactly where the problem lies. Start with a visual inspection of each panel, looking for cracks in the glass, discoloration, burn marks around junction boxes, and signs of moisture intrusion. Check all wiring connections for corrosion, loose terminals, or charred insulation.
Next, use a multimeter set to DC voltage to test each panel individually. Compare your readings against the manufacturer’s specifications listed on the panel’s label. A panel producing significantly less voltage than rated indicates internal cell damage or failed bypass diodes. Test string voltage as well, if one panel drags down the entire string’s output, you’ve found your culprit.
Thermal imaging cameras identify problems invisible to the naked eye. Scan panels during peak sun hours to spot hot spots, which appear as bright areas on the thermal image. These indicate failing bypass diodes, cracked cells, or poor electrical connections generating excessive resistance heat.
Check your inverter’s diagnostic display or monitoring app for error codes. Most modern inverters log fault histories and performance data. Common codes point to specific issues: ground faults, arc faults, or AC/DC imbalance. Cross-reference these codes with your manufacturer’s troubleshooting guide.
Document all findings with photos and measurements. This record helps you order the correct replacement parts and provides valuable information if you ultimately need professional assistance.
Step 3: Removing and Replacing Damaged Components
With the damaged component identified and the system safely isolated, you can proceed with the actual repair work. The procedures vary significantly depending on what has failed, but maintaining weatherproof integrity throughout is non-negotiable.
Bypass Diode Replacement
Bypass diodes fail more frequently than most other components, typically showing up as hot spots during thermal imaging. Open the junction box on the back of the affected panel and locate the failed diode, which often appears burned or discolored. Unsolder or disconnect the failed diode, taking note of its polarity orientation. Install the replacement diode (rated for the same amperage, typically 10-15A for residential panels) in the exact same orientation. A reversed diode will bypass the entire panel string continuously. After securing the connections with high-temperature solder, apply dielectric grease to the terminals and ensure the junction box gasket sits flush before closing.
Junction Box Repair or Replacement
When the junction box itself is cracked, corroded, or has a compromised seal, complete replacement is usually the most reliable fix. Here’s the proper sequence:
- Photograph the existing wiring configuration before disconnecting anything, capturing wire colors and terminal positions.
- Disconnect all wiring from the junction box terminals, labeling each wire with tape if the color coding isn’t obvious.
- Remove the old sealant around the box perimeter using a plastic scraper, being careful not to damage the panel backing.
- Unscrew or pry off the damaged junction box, cleaning the mounting surface completely.
- Apply a continuous bead of solar-grade silicone sealant around the new junction box mounting flange.
- Position the new box, securing it with stainless steel screws or the provided adhesive backing.
- Reconnect the wiring exactly as photographed, ensuring each connection is tight and properly seated in the terminals.
- Apply additional sealant around the box edges and cable entry points, smoothing it to shed water away from the box.
For junction boxes with potting compound (the black goo protecting internal connections), you’ll need to carefully excavate around damaged wiring without disturbing functioning connections. After repairs, re-pot using two-part silicone potting compound designed for outdoor electrical use.
Wiring Connection Repairs
Damaged MC4 connectors or frayed wiring between panels requires immediate attention. Cut back damaged wire to clean copper, strip the insulation carefully without nicking the conductor, and crimp on new MC4 connectors using the proper tool (pliers will not create a reliable connection). Each connector must click audibly when mated and require significant force to separate. For hardwired connections in combiner boxes, use appropriate wire nuts or terminal blocks rated for outdoor use and the system’s DC voltage, then seal with self-fusing silicone tape.
Cracked Glass and Frame Damage
Cracked panel glass cannot be reliably field-repaired and compromises both performance and safety. Small cracks that haven’t penetrated to the cells might be temporarily stabilized with clear UV-resistant epoxy applied from the top, but this is a stopgap measure. Plan for panel replacement. Frame damage that doesn’t affect the glass seal can sometimes be straightened or reinforced, but bent frames often indicate impact damage that may have also harmed the cells. If you must work around a cracked panel temporarily, seal any glass penetrations completely to prevent moisture intrusion until replacement.
Throughout all repairs, remember that every penetration you make or seal you disturb creates a potential water entry point. Use only sealants rated for solar applications that can handle temperature cycling from below freezing to 150°F or higher. Marine-grade silicone and solar-specific butyl tape are your primary sealing materials.
Step 4: Reconnection and Weatherproofing
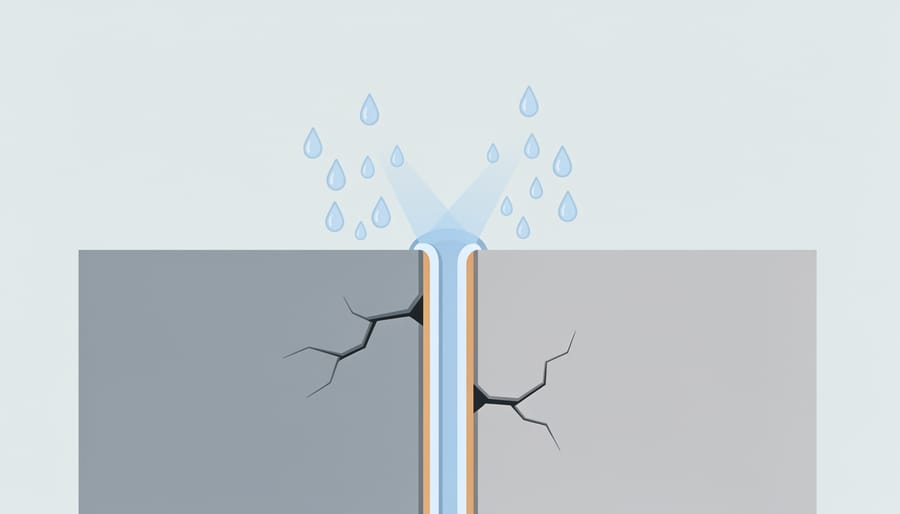
Once you’ve replaced the damaged component, reconnecting the system properly is critical to long-term reliability. Begin by inspecting all wire terminations for corrosion or damage before making connections. Strip any oxidized wire ends and apply dielectric grease to terminal points to prevent future corrosion. When reattaching wires to junction boxes or connectors, follow the torque specifications in your panel’s documentation, typically 7-9 inch-pounds for most terminal screws. Under-torquing creates resistance and heat buildup, while over-torquing can crack terminals or strip threads.
Apply a generous bead of UV-rated silicone sealant around the junction box perimeter where it meets the panel back sheet. The sealant should form a continuous barrier without gaps. For cable entry points, use strain relief grips and seal them with cable glands rated for outdoor solar applications. Don’t rely on electrical tape for weatherproofing, it degrades rapidly under UV exposure.
Before closing any access covers, perform a final visual check for pinched wires, loose connections, or debris inside junction boxes. Verify that all fasteners are seated flush and that gaskets or O-rings are properly positioned. Test the seal integrity by gently tugging on wires to confirm they’re secured without movement at entry points.
Step 5: System Re-energization
After completing repairs and weatherproofing, bringing your solar system back online requires a methodical approach to prevent equipment damage and ensure safe operation.
Start by visually inspecting all connections you worked on, verifying that junction box covers are secure, wire terminals are tight, and no tools or materials remain on the array. Check that all DC circuit breakers and disconnects remain in the off position before proceeding.
Begin re-energization at the panel level by reconnecting DC circuits in reverse order of shutdown. Close DC combiners or individual string disconnects first, then move toward the main DC disconnect. Use your multimeter to verify expected voltage appears at each connection point as circuits are restored.
Next, close the main DC disconnect and confirm proper voltage reaches the inverter input terminals. Most residential systems should show 300-600 volts DC depending on string configuration and sunlight conditions.
Power up the inverter according to manufacturer instructions, which typically involves closing an AC disconnect and pressing a startup sequence. Modern inverters will run self-diagnostics before beginning power conversion. Watch the display for error codes during the first few minutes of operation.
Monitor output power carefully during the first hour. Production should match expected levels based on current sunlight conditions and historical performance data. Listen for unusual sounds from the inverter and check that cooling fans activate properly under load.
Testing and Verification After Repair
Once the system is back online, systematic verification confirms whether your repair eliminated the problem and restored proper operation. This phase is as critical as the repair itself, catching incomplete fixes early prevents further damage and ensures you’re truly solving the underlying issue.
Start by taking baseline electrical measurements immediately after re-energization. Use a multimeter to verify that string voltages match the expected open-circuit voltage for your panel configuration (typically 30-50V per panel in series). Check that current output aligns with the available sunlight, under full sun, each string should produce within 5-10% of its rated short-circuit current. Compare these readings to your pre-repair diagnostics and to similar conditions on days when the system performed normally. Significant discrepancies indicate the repair didn’t fully address the problem or introduced new issues.
Your verification checklist should include:
- Measure DC voltage at the array output and compare to expected values for current weather conditions
- Monitor AC power production through your inverter display or monitoring app for at least two full sunny days
- Conduct visual inspection of all repair points, checking for proper sealing and secure connections
- Perform thermal imaging scan of repaired areas to confirm no new hot spots have developed
- Review inverter error logs to ensure no fault codes appear during the first 48 hours of operation
Thermal imaging provides particularly valuable confirmation. Scan the repaired panels and surrounding modules during peak production hours, looking for temperature uniformity. Properly functioning panels typically run 15-25°C above ambient temperature, with variation of less than 10°C across the array. Hot spots exceeding 15°C above neighboring cells signal ongoing problems. Many professional diagnostic tools include thermal cameras that make this verification straightforward.
Document everything methodically. Photograph the repaired components, record all electrical measurements with date and weather conditions, and note your thermal imaging results. Create a repair log that includes the problem description, parts replaced, measurements before and after, and any observations during the first week of operation. This documentation proves invaluable for warranty claims, future troubleshooting, and demonstrating proper maintenance if you sell your property.
Monitor system performance closely for two to three weeks following the repair. Daily production should track consistently with weather patterns and historical performance data. Watch for gradual declines, intermittent drops, or new error messages that might indicate incomplete repairs or related issues developing. Most monitoring systems let you compare current output to previous periods, your repaired system should match or exceed its pre-problem performance levels under similar conditions.
When to Call Professional Solar Repair Services
Some solar repairs demand specialized expertise that extends beyond typical DIY capabilities. If you’re facing structural damage to roof mounts or racking systems, call a professional immediately. These repairs often require engineering assessments to ensure your roof can still safely support the array’s weight and wind loads. Similarly, grid-tied inverter repairs should always go to certified technicians. These devices operate at both high DC and AC voltages, interface directly with utility power, and require specialized programming tools that manufacturers only provide to authorized service partners.
Warranty-covered repairs represent another critical reason to choose professional service. Attempting DIY fixes on panels, inverters, or optimizers still under warranty typically voids that coverage entirely, potentially costing you thousands in future replacement costs. Professional solar repair companies maintain manufacturer certifications that allow them to perform warranty work while preserving your coverage. They also carry liability insurance that protects you if something goes wrong during the repair process.
Complex electrical issues like ground faults, arc faults, or intermittent failures require diagnostic equipment most homeowners don’t own. Professional services use specialized tools including PV testing equipment, insulation resistance testers, and advanced thermal imaging cameras to pinpoint problems that basic multimeters miss. Leading solar service companies report that most residential repairs take one to three days from initial contact to completion, though parts availability can extend that timeline.
When you contact a professional service, expect a thorough diagnostic visit first. Reputable companies will provide written estimates detailing the problem, required parts, labor costs, and timeline before starting work. They’ll pull necessary electrical permits, use manufacturer-certified replacement components, and provide documentation that proves the repair maintains your system’s code compliance and warranty status. For grid-tied systems, professional repairs also ensure your utility interconnection agreement remains valid and that all safety disconnects function properly.
Frequently Asked Questions About Solar Panel Repairs
How much do solar panel repairs typically cost?
Minor repairs like replacing a bypass diode or fixing loose wiring connections typically range from $200 to $500, while more extensive repairs such as replacing damaged panels or inverters can cost $1,000 to $3,000 or more. Many repairs are covered under manufacturer warranties during the first 10-25 years, potentially reducing out-of-pocket costs to just service call fees.
Will DIY repairs void my solar panel warranty?
Most manufacturer warranties require repairs to be performed by certified technicians to remain valid, and unauthorized modifications typically void both equipment and performance warranties. Always check your warranty documentation before attempting repairs yourself, as professional service preserves warranty coverage and often includes warranty on the repair work itself.
Does homeowners insurance cover solar panel damage from storms?
Standard homeowners insurance policies typically cover solar panel damage from covered perils like hail, wind, and falling debris, though you may need to pay your deductible. Contact your insurance provider to confirm your specific coverage and consider whether filing a claim makes financial sense compared to the repair cost and potential premium increases.
How long do solar panel repairs usually take?
Simple repairs like replacing junction box components or fixing wiring issues can be completed in 2-4 hours, while panel replacements or more complex electrical work may take a full day or require multiple visits. Service scheduling can add several days to weeks depending on technician availability and parts ordering.
Can older solar panels be repaired, or should they be replaced?
Panels over 15-20 years old can often be repaired if the damage is isolated to specific components like diodes or junction boxes, but widespread degradation or frequent failures may indicate it’s time to consider repowering solar projects with newer, more efficient technology. A qualified solar technician can assess whether repair costs justify extending the system’s life or if replacement offers better long-term value.
What records should I keep after solar panel repairs?
Maintain detailed documentation including repair invoices, parts receipts, before-and-after performance data, photos of the damage and completed work, and copies of any warranty claims or insurance filings. These records prove valuable for future warranty claims, insurance purposes, and when selling your home, as they demonstrate proper system maintenance.
Beyond these common questions, homeowners should establish a relationship with a qualified solar repair service before problems arise. Having a trusted technician who understands your specific system makes emergency repairs faster and less stressful. Regular maintenance visits, typically recommended every 2-3 years, can catch minor issues before they become major repair needs, protecting both your investment and your system’s energy production capacity.
Protecting your solar investment means addressing repair needs promptly rather than watching small issues escalate into system failures. The difference between a $200 junction box repair today and a $2,000 panel replacement next year often comes down to taking action when you first notice performance drops or physical damage.
Throughout this guide, we’ve seen that some solar repairs fall within the capability of technically-inclined homeowners who understand electrical systems and safety protocols. Basic diagnostics, bypass diode replacements, and junction box resealing can be DIY projects when approached with proper precautions. However, professional repair services bring irreplaceable value: manufacturer certifications that preserve warranties, specialized diagnostic equipment that pinpoints elusive problems, and the expertise to handle complex electrical and structural issues safely.
Whatever repair path you choose, documentation matters. Maintain detailed service records including dates, photos of damage, replacement part specifications, and performance data before and after repairs. These records prove invaluable for warranty claims, insurance purposes, and future troubleshooting. Building a relationship with a qualified solar repair service in your region provides peace of mind, even if you handle minor maintenance yourself.
The solar industry continues advancing rapidly. In 2026, improved panel durability, self-diagnostic monitoring systems, and predictive maintenance algorithms are transforming how we approach repairs. Modern inverters flag potential issues before they cause shutdowns, while enhanced weatherproofing extends component lifespans. These innovations mean fewer emergency repairs and more planned maintenance, keeping your system producing clean energy for decades to come.